
White Chocolate Mud Cake Recipe
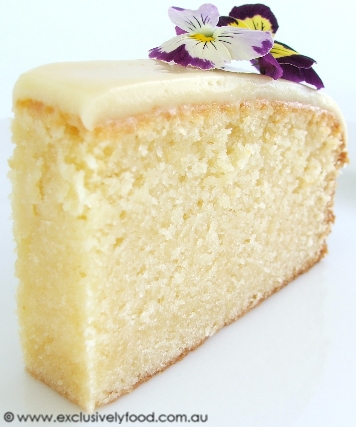
As with every other white chocolate mud cake we have tasted, this cake has a fairly subtle white chocolate flavour. We like to make the cake a few days before serving as the flavour and texture of the cake improve with time. Although we store the cake in the fridge, we bring it to room temperature before serving; it is softer and more cake-like at room temperature.
When experimenting with recipes, we found that some of the larger, higher cakes became very brown and dry on the outside before they were properly cooked in the middle. This recipe makes a cake that is about 5cm tall when iced. You could make two of these cakes and sandwich them together with ganache if you would like a finished cake that is quite tall.
The white chocolate ganache contains sour cream to cut some of the sweetness of the white chocolate.
Serves about 16.
We use a 20ml tablespoon and 250ml measuring cup for all of our recipes.
300g white chocolate (we use Cadbury Dream white chocolate)
200g butter (if using unsalted butter, add 1/4 teaspoon fine table salt with the butter)
250ml (1 cup) milk
165g (3/4 cup) caster sugar
2 teaspoons (10ml) vanilla extract
2 large eggs, lightly beaten (we use eggs with a minimum weight of 59g)
100g (2/3 cup) self-raising flour
150g (1 cup) plain flour
Sour Cream and White Chocolate Ganache
200g white chocolate
88g sour cream
Preheat oven to 160 degrees Celsius (145 degrees Celsius fan-forced).
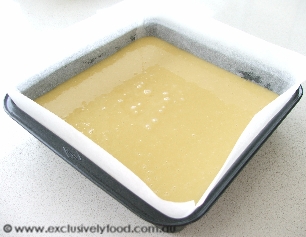
Grease a 20cm square cake pan and line the base and sides of the pan with baking paper.
Place chocolate, butter, milk and sugar in a large saucepan over low heat, stirring frequently. Remove from heat when chocolate and butter have melted, and stir mixture until completely smooth. Allow mixture to cool at room temperature for 15 minutes.
Add vanilla and eggs to chocolate mixture and stir until well combined. © exclusivelyfood.com.au
Stir flours together in a large bowl. Add one cup of chocolate mixture to the flour and stir until a smooth paste forms.

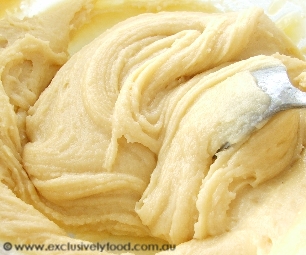
Repeat with another cup of the chocolate mixture.
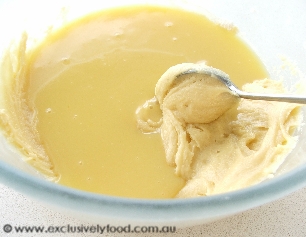
Add remaining chocolate mixture and stir until mixture is smooth. This gradual method of combining the wet and dry ingredients helps prevent lumps.
Pour mixture into prepared pan.
Bake for about 1 hour 10 minutes to 1 hour 20 minutes. When the cake is ready, a fine-bladed knife inserted into the centre of the cake should come out without any batter attached.
Loosely cover cake with greaseproof paper or a clean tea towel and allow it to cool to room temperature in pan.
The cooled cake can be iced with the white chocolate ganache immediately (see directions below), or stored and then iced on the day of serving.
Store cake in an airtight container in the refrigerator and bring to room temperature before serving. The cake is suitable to freeze iced or uniced.
Sour Cream and White Chocolate Ganache
Melt white chocolate in a small saucepan over very low heat, stirring frequently. When chocolate has completely melted, remove from heat and quickly stir in sour cream. Use immediately, or if your ganache is quite runny, set it aside at room temperature to thicken slightly before using. © www.exclusivelyfood.com.au
White Chocolate Mud Cake Ingredient Quantities for Various Pan Sizes (pdf)
The following photos were submitted by Brendan, who made these owl and Hello Kitty birthday cakes for his girlfriend.


The following photo was submitted by Beckie, who made this mud cake for her engagement party. A white chocolate mud cake and a chocolate mud cake were sandwiched together with a layer of chocolate ganache. The cake was then iced with white chocolate ganache. White chocolate panels were positioned around the outside, and the top was decorated with pink frangipanis.

Chocolate Mud Cake (double the quantities specified in the recipe).
White Chocolate Mud Cake (triple the quantities specified in the above recipe).
Pan Size: 30cm square
Baking time and temperature: Both cakes were covered with baking paper and baked at 150 degrees Celsius (fan-forced) for about 1 hour and 45 minutes.
The following photo was submitted by Neree, who made this cake for her daughter's birthday.

Ingredients: Neree doubled the ingredient quantities in the above recipe, and then adapted the recipe to make it gluten free. The following changes were made:
The plain flour was replaced by the same quantity of Healtheries Simple Baking Mix.
Each cup of self-raising flour was replaced by 1 cup Healtheries Simple Baking Mix plus 1 heaped teaspoon gluten-free baking powder.
About 2 cups whole macadamia nuts were ground in a food processor, and the resulting macadamia meal was added to the cake mixture.
Neree says, "Gluten free flours often result in a drier final product - the nuts help with moisture. Adding some of the dry ingredients to the nuts when processing helps stop them forming a paste."
Pan sizes: 19cm diameter round and 23cm diameter round
Neree cut the middle out of the smaller cake, spread the top of the larger cake with ganache, and then placed the smaller cake on top of the larger cake. The whole cake was then covered with melted white chocolate, which was allowed to set before the mermaid's pool was filled. Cooled, but not set, blueberry jelly (made with about 2/3 of the recommended amount of water) was poured into the cavity. The cake was decorated with seashell chocolates, coloured sugar, fruit jubes, candles and a mermaid doll.
The following photo was submitted by Jolene, who made these cakes for her sister-in-law's wedding. The ivory-coloured fondant icing was attached to the cakes with sugar syrup. The seashell chocolates were fastened with melted white chocolate.
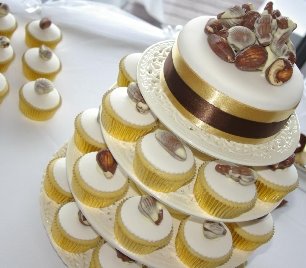
The cutting cake was made from one batch of batter baked in a 6 inch (15.2cm) diameter round pan at 145 degrees Celsius (not fan-forced). One batch of batter was used for every 12 Texas muffin size cupcakes. The cupcakes were baked at 145 degrees Celsius (not fan-forced) for 35 minutes.
.png)


253 Comments:
«Oldest ‹Older 401 – 253 of 253 «Oldest ‹Older 401 – 253 of 253
Review this recipe/article
Subscribe to Post Comments [Atom]
Have you made this? Share a photo in our Flickr group.<< Home