
Sponge Cake Recipe
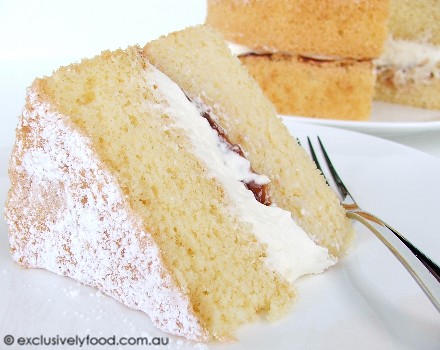
We filled this light and delicate cake with strawberry jam and whipped cream, and dusted the top with icing sugar. Other suitable fillings/toppings include fresh fruit (such as strawberries), buttercream, and glace icing. The texture of the cake is different from that of store-bought sponge cakes, which usually contain added emulsifiers.
If you aren't using the egg size specified in the recipe, use 208-220 grams of egg (without shell).
When combining the flour with the egg mixture, try to work quickly but gently, folding (rather than stirring) the ingredients together to retain as much air in the mixture as possible. Once the cakes are in the oven, we avoid opening the oven until the cakes are a light golden colour and appear cooked.
This recipe yields two sponge cakes, each about 3.5-4cm tall.
Preparation time: about 25-30 minutes (excludes baking and cooling time)
Serves about 8.
We use a 20ml tablespoon and 250ml measuring cup for all of our recipes. All measurements are level.
100g (2/3 cup) self-raising flour
50g (1/3 cup) cornflour (cornstarch)
1/8 teaspoon fine salt
5g (1 teaspoon) butter, at room temperature
60ml (3 tablespoons) boiling water
4 large eggs, at room temperature (we use eggs with a minimum weight of 59g)
150g (2/3 cup) caster sugar (superfine sugar)

If your oven is not fan-forced or has a fan-forced function that can be switched off, preheat oven to 190 degrees Celsius (no fan), and move the oven rack to about one-third of the way up from the base of the oven. If you are using a fan-forced oven and are not able to turn the fan off, preheat oven to 170 degrees Celsius.
You will need two 20cm diameter (base measurement) cake pans that are at least 5cm deep. Grease the insides of the pans. Line the base of each pan with a circle of non-stick baking paper. Grease the baking paper (this will make it easier to pull the baking paper off the cake when removed from the oven).
Sift the self-raising flour, cornflour and salt together three times to remove lumps, aerate, and thoroughly combine the ingredients.

Above: Sifting onto a sheet of greaseproof paper.
Once the ingredients have been thoroughly sifted, place the sifter over a bowl or on a piece of greaseproof paper to catch any flour that might escape from the sifter. Return the flours to the sifter, and set aside until it is time to sift the flours into the cake mixture.
Place the butter and boiling water in a small heatproof jug. The water needs to be hot so that the butter will completely melt.
Place the eggs in a large bowl. Using an electric mixer or electric hand-held beaters, beat on medium-high speed for about ten seconds to combine the yolks and whites.

With the beaters running, add the sugar to the eggs and continue beating on medium-high speed.

After about eight minutes, the mixture should be thick and pale.

When you lift the beaters, the mixture that falls from the beaters should sit on top of the egg mixture (rather than sinking in).

Sift about one third of the flour mixture over the egg mixture, and using a large deep spoon, gently but quickly fold the flour into the egg mixture until nearly combined.


Sift half the remaining flour over the egg mixture and gently fold until nearly combined.
Sift the remaining flour over the egg mixture and pour the water/butter mixture around the edges of the bowl. Fold the ingredients together, making sure you scrape the bottom of the bowl as you fold so the water combines with the other ingredients and doesn't remain in a pool at the base of the bowl. Don't mix any more than is necessary to combine the ingredients — if you knock too much air out of the mixture the resulting cakes will be flat and tough.
Divide the mixture evenly between the prepared pans.

If your oven has any hot spots, try to avoid placing the cake pans in the hottest areas of the oven. Bake for about 20-24 minutes or until the cakes are lightly golden and spring back when gently pressed in the centre. We don't use a knife/skewer to test the cakes in case they deflate.
Place a piece of non-stick baking paper on a wire rack, and turn the cakes out onto the baking paper. The baking paper helps prevent the tops of the cakes from being marked by, or sticking to, the wire rack. Gently peel the baking paper off the cakes.

Turn the cakes over so they are top side up. Allow cakes to cool. We place a piece of greaseproof paper loosely over the cakes while they are cooling to help prevent them from drying out.

Above: Each cake layer should be about 4cm tall.
When completely cool, fill and top cakes as desired, or store until required. The cakes can be placed in an airtight container or wrapped in plastic wrap and stored at room temperature or in the freezer. If the cake is filled with fresh cream, it will need to be refrigerated.
To sandwich the cakes together with jam and cream:
250ml (1 cup) cream (about 35 to 40 percent fat)
4g (1 teaspoon) pure icing sugar
85g (1/4 cup) strawberry jam
Extra icing sugar, for dusting
Using an electric mixer or electric hand-held beaters, beat the cream and icing sugar together until thick. Using an offset spatula or the back of a spoon, spread the jam over the top of one sponge.

Top the jam with cream.

Place the second sponge on top of the cream. Dust with pure icing sugar and cut into slices to serve. © www.exclusivelyfood.com.au

.png)


13 Comments:
Hi There, I love your recipe and can't wait to try this out. Quick question, when do we add butter/water mixture?
You may wish to re-read the recipe as it clearly states when you should add the butter/water mixture.
Hi! I am looking to make a sponge cake for a birthday cake but need a bigger cake. If I double this recipe how much longer would I have to bake it for?
Also could I turn this recipe into a chocolate sponge?
Thanks for all your great recipes. I have never had one fail yet :)
looks absolutely delicious!
have a nice time!
Paula
This looks so good, I am drooling!
To the above poster it says to add the mixture as follows, "Sift the remaining flour over the egg mixture and pour the water/butter mixture around the edges of the bowl. Fold the ingredients together, making sure you scrape the bottom of the bowl as you fold so the water combines with the other ingredients.."
This was my first attempt at making a sponge and it turned out great - thanks! Just wanted to point out a discrepancy with the conversions though:
100g (2/3 cup) self-raising flour
150g (2/3 cup) caster sugar (superfine sugar)
Does 100g or 150g = 2/3 cup?
I was weighing everything on a scales so I used 150gm - should this have been 100gms?
The recipe is right!
1 cup flour is not the same as 1 cup sugar
1 cup caster sugar=225g
1 cup flour (plain or self-raising)= 150g
There is a useful Cup to gram conversion table on this website (http://www.exclusivelyfood.com.au/2007/04/what-does-1-cup-of-weigh.html)
Yum!
I love this cake, is really worth recommending:)
Yours,
Thanks for the recipe. I made it for my husband and he loved it!
hello, i'm planning to bake a chocolate sponge cake and decided to only trust your site.
so if i want to turn this sponge cake into chocolate spongecake, do i add chocolate into the mixture?
i made this an it turned oput great for my first sponge it did have an egg smell though??
Hi, have made several of your cakes and all a huge success. Huge fan of your site. Followed everything in this recipe, however the layers only ended up 2cm thick. I tried not to over mix the mixture, not quite sure what went wrong.
this cake turned out beautiful. after plenty attempts to make a sponge finally l made 1 that my family enjoyed. thank you very much...<3
Review this recipe/article
Subscribe to Post Comments [Atom]
Have you made this? Share a photo in our Flickr group.<< Home